Showing posts with label DIY. Show all posts

Monday, May 5, 2014

String Globe Decorations, Eggs, or Spheres of Awesome DIY

A few weeks ago, I got my craft on to decorate the outside of our house.
The result was fantastic, however, I recommend not using these marvelous "eggs" or "spheres of awesome" as outdoor decorations.
They will fall apart in the wind, rain, hail, snow, and mother nature's fury or that could just be Montana.


 You will need:
  • String in your designated colors of joy
  • Glue and flour to create a lovely paste
  • Some tap water
  • Bowl to mix this greatness
  • Balloons
  • Scissors
  • Paper towels or parchment paper to cover your surface


Helpful hint: See that glorious multicolor string? It didn't work so well with the balloons. I recommend using the other singular colors.


Blow up your balloons into your designated shape.  I wanted mine to be egg-like so they are pretty much at full capacity, however, if you want them to be smaller-use less air.


I experimented quite a bit with this.  For some balloons I used solely flour and water.  For others I used flour + glue + water.  I really like that last mixture.  It lasted through several of Montana's hellacious weather escapades.


 Cut several strands of string of various lengths and make sure they soaked in mixture.  Use your fingers to strain excess from them.


 Start tying around the balloon. 


Have your balloons sit out for at least 24 hours.  Mine sat out like this for 3 days.

 
Pop the latex balloon and voila- you have this glorious string egg or sphere or awesome.
 
They looked awesome outside but for all that work, I don't recommend leaving them out there.  If used indoors, it would make an amazing party decoration.
If you liked this post, share it with others! If you feel particularly moved by it, leave a comment because I love feedback and discussion. Social media links are provided below and thanks for reading!
 photo signature_zpsc0b51015.jpg

Monday, December 23, 2013

How To Make a Tacky Sweater

Here are two tutorials, but I must admit are not my best.  If you've followed previous tutorials I give you step-by-step pictures but I made these late at night and was so focused on getting them done that I took very few photos of the process.  So for that, I apologize but I also think you can get the gist of things by what I've provided.  If not, feel free to send me an e-mail :)

Supplies:
Sweatshirt
Fabric Paint
Cardboard or Something to Place in Sweatshirt
Paint Brushes
Decorating Accessories
Fabric Tacky Glue
Optional: Washi Tape

What Kim Used:  I found our sweatshirts at Old Navy, where they had a sale on their crewnecks for only $10.  Super comfortable and great quality?  It's a win-win for everybody.  

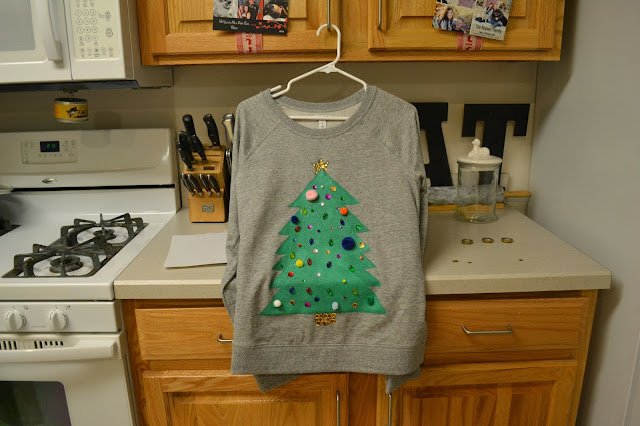
Initially I wanted a very deep green for my sweatshirt because I was going to make a tree, however, I couldn't find the right color at Michael's.  I knew that I had black fabric paint at home, so I decided to make my own color at home.  However, once I got home I realized a more minty green would look fabulous on the sweatshirt.  So instead of mixing black, I actually added white and silver sparkles fabric paint.  I created a custom sparkly mint green for my tree and it turned out really cute.

Michael's sold cardboard shirt pieces for painting shirts and making sure the paint didn't bleed through so I spent a $1.50 on that.  Obviously cardboard from your garage works just as well but I honestly didn't want to cut up a box.  It's the holidays and they're already stressful so no thanks!

When it came to decorating accessories, I had a ton of various sequins at home and I bought Christmas light buttons and pom pom balls of different sizes while I was at Michael's.  I also had tacky glue at home so this was a fairly inexpensive project for me.


Step 1: I placed the cardboard piece in the sweatshirt and also laid out a pattern of a tree using the washi tape.  Now you don't necessarily need washi tape but in using it, I had really clean lines and it also inspired me to create that custom mint color instead of a dark green. 

Step 2: Paint!  After I painted my first layer, I realized that there was way too much space between the branches of the tree.  Therefore I whipped out the washi tape once again and added more!

 
Step 3: Decorate! Once your tree is significantly dry, take that tacky glue and start adding your accessories.  I used sequins as ornaments, buttons as lights (because, well they actually look like Christmas lights), and pom poms as various ornaments too.  

 
Step 4: Top her off with a star and a base.  I laid out various sizes of gold sequins and put those aside to make the base and star of the tree.  I then took the tacky glue and created those shapes on the sweatshirt and added the sequins.


Just wait for it to dry and there you have your own tacky Christmas sweater!!

Now this next one is trickier and of course, I only have pictures of the finished product (sorry!). You'll really only need that washi tape and white fabric paint for this.  I used the pointed tip of the fabric paint as my detail tool and I also printed off various pictures of a similar design to freehand this.


Step 1: Print off your design so that you can scale it according to the sweatshirt's size and section it off in washi tape.  I created a large rectangle as the outer layer and then separated it into rows so that I could add the text and content.

Step 2: Start designing!  The most complex aspect of this design is how detailed it is.  If you look at the screenprinted sweaters, the design is made to look like it's hand-embroidered.  So I used tons of connecting X's to make this and it took awhile but I love the finished product.  The washi tape helped to make sure that everything turned out symmetrical and looked great.


Just wait for it to dry and you have a great tacky Christmas Sweater!
 
 
If you liked this post, share it with others! If you feel particularly moved by it, leave a comment because I love feedback and discussion. Social media links are provided below and thanks for reading!
 photo signature_zpsc0b51015.jpg

Wednesday, December 4, 2013

Melted Snowman Ornament Tutorial

December it's the most wonderful time of the year!!


This melted snowman ornament could melt anyone's heart! It takes a bit of effort on the crafter's part but the result is very cute and perfect addition to any tree.


Make sure the ribbon you get has the wire edge because it helps you shape it into a scarf later on.
 
 My "work space" was my kitchen counter and I used a baking sheet to lay out the clay pieces I had.  I bought multiple clay pieces but didn't even use entire blocks and I made six ornaments.  I have clay shaping tools, however, a butterknife works perfectly for those who don't have those in supply.

 For the carrot noses, I rolled it out and adjusted my position on where I was holding it against the counter.  By adjusting and rolling, it thinned out one end to create a point.  I then bent the carrots, as well as the branches, to give them an imperfect look and give each snowman character.

 While the pieces were baking at the temperature suggested on the clay packaging, I got started on filling each ornament with "snow."  While hovering over the kitchen sink, I filled each one with snow white glitter until there was a good base in each ornament.

 I then cut pieces of the ribbon in half.  With one of the edges being the wire piece, I folded it using an accordion style.  This made the ribbon look like it was a scarf left behind.


Drop the clay pieces into the ornament and rearrange using the edge of a pencil.  Some pieces can be partially covered by snow and have fun with it! :)


The most time consuming part of this craft is the creation of the pieces.  Baking only takes a few minutes and once the pieces have cooled, it's all about assembling them together.  The result is a really cute ornament that is perfect for an ornament exchange or Christmas gift!
 
 
If you liked this post, share it with others! If you feel particularly moved by it, leave a comment because I love feedback and discussion. Social media links are provided below and thanks for reading!
 photo signature_zpsc0b51015.jpg

Tuesday, December 3, 2013

Santa Hat Garland Tutorial

Winter


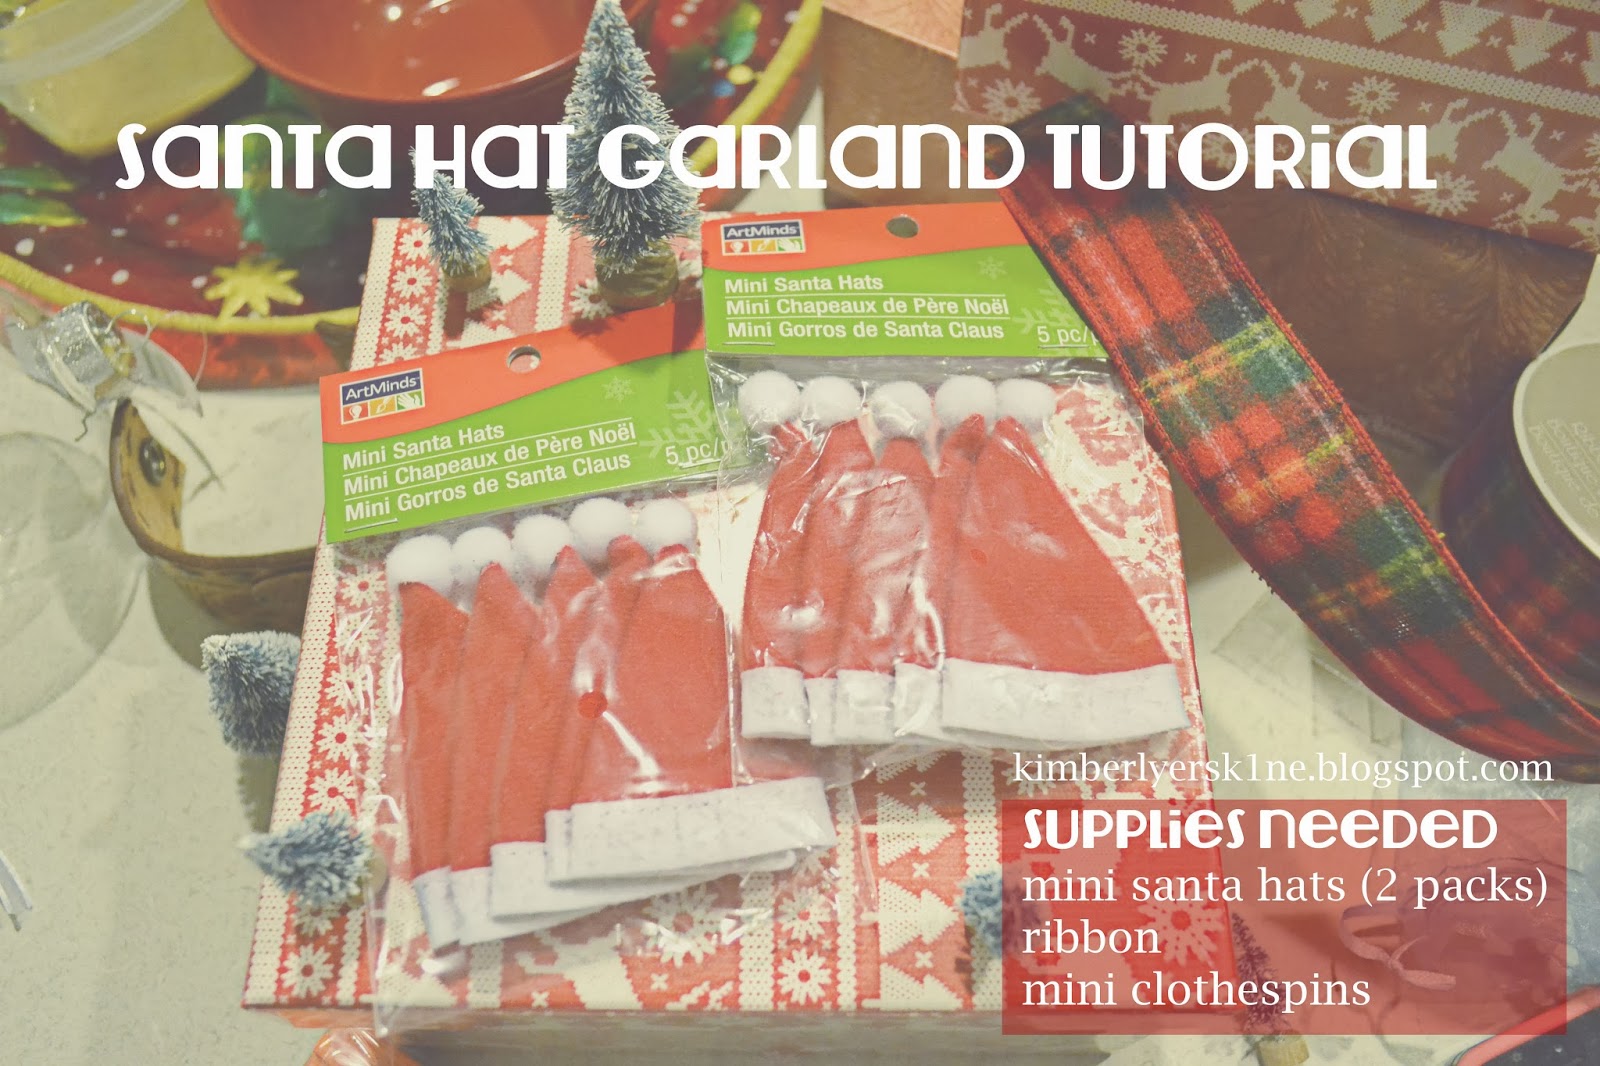
 This tutorial is so easy to do!  It will literally take you minutes and the result is so cute!

All you need for this uber easy crafting project is to purchase two packs (each pack comes with five) miniature santa hats.  Our local Michael's has a whole display of miniature items and that's where I found these guys.


Measure out your ribbon to accommodate whatever size garland you would like to have.  Don't forget to leave extra ribbon on the ends to hang up the garland.


Then clip the santa hats onto the ribbon using mini clothespins and there you have it, a garland that is affordable, simple, and perfect for display!

What are some of your favorite easy craft projects and traditions for the holiday season?
 
If you liked this post, share it with others! If you feel particularly moved by it, leave a comment because I love feedback and discussion. Social media links are provided below and thanks for reading!
 photo signature_zpsc0b51015.jpg