Wednesday, December 25, 2013

I've Waited All December for This Moment


 I love Christmas.
It's such an incredibly special time for me.  While I was growing up, I was blessed with a grandma who loved Christmas as much as I do today.  Everything from my love to Christmas, Disney, and crafting comes from her.  She was a pretty stellar lady.
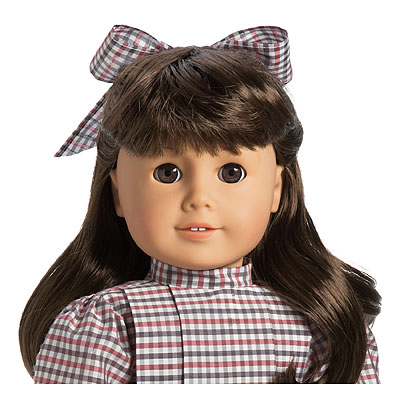
Her Christmases were so magical and filled with wonder and true family bonding. I have the best memories because of those family gatherings.  When I was I think, 9-years old, I received my very first American Girl Doll, Samantha.  We went to Christmas Eve mass at St. Mary's or St. Mark's and then headed to my grandma's house.  It was my family, my cousins, aunt, uncle, and grandma.  We usually had to have Christmas Eve dinner first and grandma had some sweet networking connections with Santa because he stopped at her house first and we were allowed to check out our presents once we were done with dinner.  As a child, I was always amazed by this.  I distinctly remembering walking from the dining room, through the kitchen, and then into the living room where my grandma's Christmas wonderland was displayed.  Each of the kids had a section that Santa had created and in my section was Samantha.  It's on a family video somewhere but I was screaming, I was so happy.

Fast forward to 2011 and my husband is deployed to Afghanistan and I am home for Christmas.  My mom, brother, and I take a trip down to Chicago and check out the American Girl Place while we're there.  If you've never been, it's a pretty awesome place.  If you haven't checked out Conan's video on it, you need to.


He's hilarious and I love it.

Back to the story...

While we're looking through the store, my mom comes across the doll, Julie and the doll is gorgeous.  My mom is from the Philippines and grew up very poor.  She had several brothers and sisters on a farm and they had no money.  They would fabricate toys out of whatever they had and as a little girl with a really expensive doll, I heard stories of my mom creating dolls out of spare bottles and a cloth wrapped around it.  At that moment, I knew my mom would love this doll but at the time I didn't have the money for it.

Well this December, Ryan and I decided to get my mom the Julie doll and I wanted her to be completely surprised.  We mailed it to my mother-in-law's house and she prompted to wrap it (which is awesome, love her).  My dad picked it up and this morning we Skyped in with them while watching the Disney Christmas Day Parade (my favorite).  I had tears in my eyes as my mom was opening it and she loved it!!


Thank you so much for my beautiful doll. It's the first one I've ever had.  I have tears in my eyes.

I love Christmas for reasons like this.  The past couple years I've had a hard time with Christmas because we've been away from family but these are the moments that make Christmas.  The Lord gave us the ultimate gift of his only son.  He gave us Jesus to take on our worldly issues and problems and to be a guiding light for us.  This time of the year is a celebration of love, faith, and hope.  For me this moment was something I had wanted to execute for years and not for the materialistic reasons of physically giving my mom a present but because I knew that this would mean so much to her.  It makes me tear up just writing this post.  It means so much to me to be able to give my mom this kind of gift and to share how much I love her.  I hope you all have a wonderful, beautiful Christmas or holiday season with your families. God Bless!  
 
 
If you liked this post, share it with others! If you feel particularly moved by it, leave a comment because I love feedback and discussion. Social media links are provided below and thanks for reading!
 photo signature_zpsc0b51015.jpg

Tuesday, December 24, 2013

A New Blog Name Feels Like Getting Your Hair Did

Welcome to the newest change here... a new name! I am so excited about this change.  A couple months ago, you may have seen on Instagram the brainstorm session start to come up with a new name.  Honestly, I was never really attached to The Simplicity.  If you followed my blog progress, it was just my name and that's why the URL is my name as well as all of my social media accounts.  I then realized while participating in blog related activities that saying "visit Kimberly Erskine" sounded a little weird to me.  Therefore, I felt really pressured to come up with a name.  That brainstorm session produced The Simplicity of Being Curious and that only lasted a few months before I shortened it to The Simplicity.  The original title was too long and then the shortened version didn't really reflect me at all.  I prefer being busy and look forward to challenges, the idea of being simple (although something I probably need in my life) didn't really meet up with what my blog is about.

That's when I came up with Little Fierce Blog.

Little Fierce Blog was inspired by Shakespeare's quote, "though she be but little, she is fierce." My entire life I have been a smaller person, but that hasn't limited my ability to be competitive and to seek the highest level of quality when it comes to my life.  I also wanted that to reflect in my blog posts.  I'm passionate about my life, what I read, what I make, and what I contribute to society.  I also don't think I've ever really considered myself a lifestyle blogger. What does that even mean?

Earlier this year, I wrote a controversial post (actually a couple) that criticized the quality of blogs out there.  It covered that larger blogs with thousands of followers were lacking in true content quality and I found the blogging community becoming more commercialized and less authentic.  My blogging friend Maria suggested that I stop following those blogs.  Honestly I was flummoxed.  Stop following these blogs?  If I did that then I probably wouldn't be following any. 

However that was the best advice I had received.  I learned a lot about myself in that transition.  The blogs that I had been following were not a good fit.  Instead I found mom blogs, crafters, people inspired by faith, and people who were just funny.  I broadened my horizons and found some true gems.  I also met so many amazing bloggers or substitute bloggers through Instagram.  It also showed me that I didn't want to do advertising on my blog and I also didn't want to pressure myself into blogging every day or that might lessen the quality of the posts.

So here is Little Fierce Blog in all of its glory. I'm really proud of it and I am pumped for 2014.  Have a bright and sparkly new year :)  


If you liked this post, share it with others! If you feel particularly moved by it, leave a comment because I love feedback and discussion. Social media links are provided below and thanks for reading!
 photo signature_zpsc0b51015.jpg

Monday, December 23, 2013

How To Make a Tacky Sweater

Here are two tutorials, but I must admit are not my best.  If you've followed previous tutorials I give you step-by-step pictures but I made these late at night and was so focused on getting them done that I took very few photos of the process.  So for that, I apologize but I also think you can get the gist of things by what I've provided.  If not, feel free to send me an e-mail :)

Supplies:
Sweatshirt
Fabric Paint
Cardboard or Something to Place in Sweatshirt
Paint Brushes
Decorating Accessories
Fabric Tacky Glue
Optional: Washi Tape

What Kim Used:  I found our sweatshirts at Old Navy, where they had a sale on their crewnecks for only $10.  Super comfortable and great quality?  It's a win-win for everybody.  

Initially I wanted a very deep green for my sweatshirt because I was going to make a tree, however, I couldn't find the right color at Michael's.  I knew that I had black fabric paint at home, so I decided to make my own color at home.  However, once I got home I realized a more minty green would look fabulous on the sweatshirt.  So instead of mixing black, I actually added white and silver sparkles fabric paint.  I created a custom sparkly mint green for my tree and it turned out really cute.

Michael's sold cardboard shirt pieces for painting shirts and making sure the paint didn't bleed through so I spent a $1.50 on that.  Obviously cardboard from your garage works just as well but I honestly didn't want to cut up a box.  It's the holidays and they're already stressful so no thanks!

When it came to decorating accessories, I had a ton of various sequins at home and I bought Christmas light buttons and pom pom balls of different sizes while I was at Michael's.  I also had tacky glue at home so this was a fairly inexpensive project for me.


Step 1: I placed the cardboard piece in the sweatshirt and also laid out a pattern of a tree using the washi tape.  Now you don't necessarily need washi tape but in using it, I had really clean lines and it also inspired me to create that custom mint color instead of a dark green. 

Step 2: Paint!  After I painted my first layer, I realized that there was way too much space between the branches of the tree.  Therefore I whipped out the washi tape once again and added more!

 
Step 3: Decorate! Once your tree is significantly dry, take that tacky glue and start adding your accessories.  I used sequins as ornaments, buttons as lights (because, well they actually look like Christmas lights), and pom poms as various ornaments too.  

 
Step 4: Top her off with a star and a base.  I laid out various sizes of gold sequins and put those aside to make the base and star of the tree.  I then took the tacky glue and created those shapes on the sweatshirt and added the sequins.


Just wait for it to dry and there you have your own tacky Christmas sweater!!

Now this next one is trickier and of course, I only have pictures of the finished product (sorry!). You'll really only need that washi tape and white fabric paint for this.  I used the pointed tip of the fabric paint as my detail tool and I also printed off various pictures of a similar design to freehand this.


Step 1: Print off your design so that you can scale it according to the sweatshirt's size and section it off in washi tape.  I created a large rectangle as the outer layer and then separated it into rows so that I could add the text and content.

Step 2: Start designing!  The most complex aspect of this design is how detailed it is.  If you look at the screenprinted sweaters, the design is made to look like it's hand-embroidered.  So I used tons of connecting X's to make this and it took awhile but I love the finished product.  The washi tape helped to make sure that everything turned out symmetrical and looked great.


Just wait for it to dry and you have a great tacky Christmas Sweater!
 
 
If you liked this post, share it with others! If you feel particularly moved by it, leave a comment because I love feedback and discussion. Social media links are provided below and thanks for reading!
 photo signature_zpsc0b51015.jpg

May the drinks get taller and the world get smaller- The Big TwoFour


I went into a capsule 23 and came out 24...quite literally.  I was scheduled for alert the day before my birthday and since I'm on alert for 24 hours, I turned 24 while being underground.

I decided to bring cupcakes with me and made over 40 with bright pink frosting.  The only mistake there is that I used hardcore dye from Michael's and it totally stains your teeth pink.


I received a really awesome birthday/Christmas present from my family back in Wisconsin.
The strange thing was that Amazon said it was from me (wrong-o) and then farther down on the paper they had the receipt so I knew what I was getting.


Didn't matter though because I was super excited. I have been wanting a Silhouette Cameo for a few years now and it was wonderful to open up!


When I got home from alert, Ryan surprised me this funny, personalized card.  I love Ryan's cards. He always adds funny quirks to it.


He also surprised me this beautiful cross necklace. It's the first piece of jewelry Ryan has given me since we've gotten married and I love it!!


After opening some presents, I finally had the opportunity to do my hair and makeup.  With work, I never really do my makeup and my hair is always in a military bun.  Curls and big hair for days!
 

I think my favorite birthday surprise from Ryan was a trip to Barnes and Noble to pick out some books.  I could spend hours in a bookstore and it was fun getting a peppermint mocha frappachino and shopping around for good reads.


After our bookstore trip, we met up with friends at Chili's for a birthday dinner.
Love me some Coronaritas!


It was a fantastic birthday and I feel so blessed to have met so many amazing people in my time being an Air Force officer.  I have so many great people in my life and was super thankful to have them celebrate my 24th with me!

May the drinks get taller and the world get smaller.

Saturday, December 21, 2013

Christmas with the Erskines: A Sneak Peek into Our Home for the Holidays


Here's a look into the Erskine household for the Christmas season...enjoy!

 
 One of my favorite things about Christmas is gift giving and this year I participated in Emmy's Christmas Gift Exchange over Instagram.

 
 My partner made me this amazing gift as a way to record memories throughout the years.

 
 With a ceramic fruit basket from Anthro and index cards, I have it propped up in our kitchen to record so many memories.

 Brittany got me the tree topper of my dreams!! Isn't it gorgeous?
 
The ornaments Ryan got from St. Nicholas.

 
 My 24th birthday present from the folks!

 Our first Christmas village! It's from the Dollar Tree and had some "handwritten" storefront signs (womp womp) but it's really cute.  I also have an African American Santa which I'm sure Megyn Kelly would love.  Have no idea what I'm talking about?  Don't stress over it.  The Fox newscaster is convinced that Santa and Jesus could only be white men.  Therefore this Santa is my little play at irony in my house.

Blu will rock antlers and Holly hates them with a passion.  Ryan had to stand with them for every picture otherwise Holly looked terrified and Blu would run away.
 
If you love this wreath, check out The Paper Mama's blog for the tutorial! 

Looking to make one of these bomb.com sweaters?  I'll be posting my tutorial on the 23rd! :)


 Blisterz's Christmas Tree Lot- super simple and incredibly cute!
All you need are bottle brush trees, which are actually really hard to find leading into Christmas so I always stock up.  Put them next to a sign (mine is made from cardstock) and you have a Christmas Tree Lot.

I've had my eye on these foxes at Target for so long! I was thrilled when one of my besties and battle buddies, Brittany surprised me with them on my birthday!


I was determined to get a nativity this year and bought this from Walmart.


It took me four baby Jesuses to find one without crazy eyes but alas, I was successful.


 I wanted to snag the camel but I only had $10 on me and had to get Hershey kisses for cookies so I went with the donkey.

 
I painted these reindeer last year and they turned out to be a perfect solution as a centerpiece.


The snowmen placemats I got on sale at Kohl's last year (we don't have a Kohl's here unfortunately) and the nutcracker placemats I found at Goodwill, along with a table runner.


Santa hat chair covers were found at the Dollar Tree for only $1 each.


I made this shadowbox last year when we I was stationed at Vandenberg.  It's a wooden shadowbox from Michael's.  I then used two pieces of scrapbook paper, a metallic blue and then a diecut snowflake piece.  I then took mini ornaments, that I believe I got at Walmart, and hot glued them together.


My mini mitten garland was made with mitten ornaments from Target last year.  A pair of mittens was $3 and then I used mini clothepins from Michael's and ribbon.  Super simple and easy to make.


We have a ton of cards from so many wonderful friends!


I used command strip style squares and thick wire edged ribbon.  You can always find ribbon sales at Michael's, especially leading into December.  I love this reindeer ribbon so much!  I picked up clothespins from the Dollar Tree.  Last year I used mini ones and it was difficult to keep the cards in place.  You can always decorate the pins with mod podge and glitter :)


With that, I hope you enjoyed our home and we wish you a very Merry Christmas!
 

If you liked this post, share it with others! If you feel particularly moved by it, leave a comment because I love feedback and discussion. Social media links are provided below and thanks for reading!
 photo signature_zpsc0b51015.jpg